Loose dust on a prepared steel surface can affect coating work. It may reduce adhesion and can retain moisture, creating conditions that may contribute to corrosion. This makes surface cleanliness assessment an important quality control step before a protective coating is applied, particularly on blast-cleaned steel.
The ISO 8502-3 dust tape test is a visual comparison method for assessing loose dust. It evaluates two separate characteristics: the quantity of dust collected on the tape and the predominant particle size class. Consistent sampling, controlled viewing conditions, and complete reporting are essential because the assessment depends on visual comparison rather than direct particle counting.
Purpose of the ISO 8502-3 Dust Tape Test
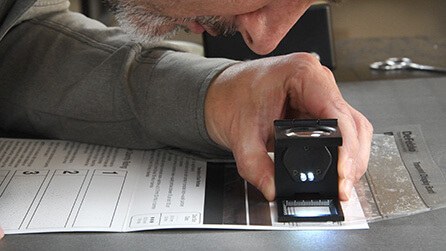
The test uses transparent adhesive tape to lift loose dust from a selected area. The tape is then mounted on a transparent display board and compared with the applicable visual reference images. A black, white, or two-tone background can be selected to provide the clearest contrast between the dust and the tape.
The result communicates the overall dust coverage and the particle size classification. These ratings should be considered independently: a surface can have one dust quantity rating and a different particle size class. The method is intended to characterize the general condition of the surface, not isolated particles or an unusually clean or heavily contaminated spot.
How to Perform the Test
Choose a representative test location
Select an area that reflects the condition of the prepared surface that will be coated. Avoid edges, corners, weld spatter, visible oil or moisture, and sections affected by handling or foot traffic. Choosing representative locations helps make the result more meaningful for the work area as a whole.
Prepare and handle the adhesive tape
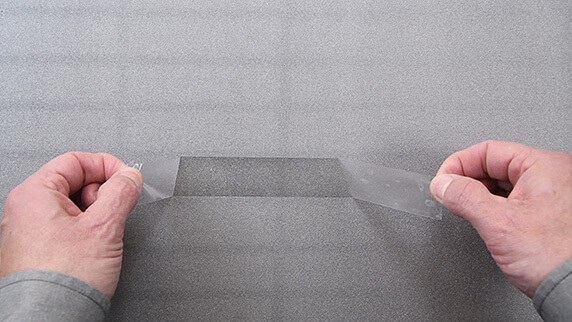
Use transparent adhesive tape intended for ISO 8502-3 testing. Remove and discard the first three turns from the roll, then cut a piece approximately 20 cm (8 in.) long. To reduce the chance of contamination, handle the adhesive only by its ends and avoid touching the central test area.
Apply the tape consistently
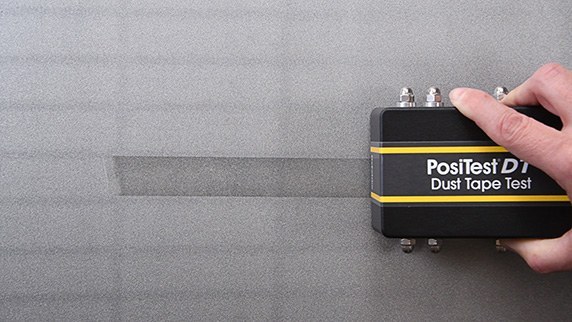
Press approximately 15 cm (6 in.) of freshly exposed tape onto the test surface using firm, uniform pressure. The tape may be pressed with a thumb or a tape roller. Move across the tape three times in each direction at a steady speed, with each stroke taking about 5 to 6 seconds. Once the sample has been collected, remove the tape and press it onto the transparent display board.
A tape roller can support more uniform pressure during application. When using a roller, keep the tape centered between its guide stripes, use steady downward force, and maintain a consistent travel speed for each pass.
Assess Dust Quantity and Particle Size
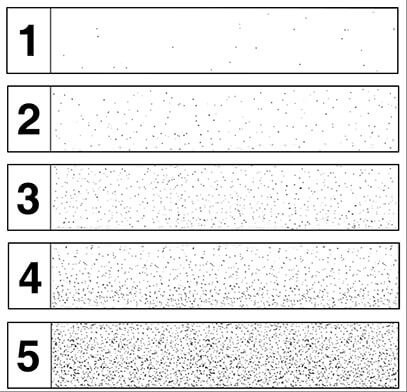
Evaluation should take place under adequate, uniform lighting. Avoid glare and reflections, maintain a consistent viewing distance, and choose the background that produces the best contrast. Compare the mounted tape visually with the relevant ISO 8502-3 reference images.
Determine the dust quantity rating
Assign the dust quantity rating that best matches the overall appearance of the test tape. The rating is based on overall coverage, not on counting particles or selecting the worst individual particle. Magnification is not required for this part of the evaluation.
Intermediate half-step ratings can be used where appropriate, such as 2.5 when the test appearance falls between ratings 2 and 3. If the tape has overall reddish-brown or black discoloration, report dust quantity rating 5 with particle size class 1.
Determine the particle size class
Compare the predominant particles on the tape with the particle size classifications. For smaller particles, a 10x magnifier may be used to select the appropriate class. Particle size is reported as a numerical class from 0 to 5 and must be recorded separately from dust quantity.
The dimensional ranges associated with the classes are descriptive guidance for visual classification. The procedure does not require direct measurement of individual particles.
Use Sufficient Tests for a Reliable Surface Assessment
For each surface type, conduct at least three tests. If results differ by more than one dust quantity rating or more than one dust size rating, perform at least two additional tests. Report the mean dust quantity rating in that situation.
Variation can occur because the method relies on visual assessment. Lighting, viewing angle, viewing distance, background contrast, sample location, and interpretation of the reference images can all influence a result. Keeping these conditions consistent helps improve repeatability between inspectors and across the project.
What to Include in the Test Report
A clear report makes the result easier to review and communicate. Record enough detail to identify the tested surface and the precise test location, including relevant features such as ledges, beams, webs, flanges, and test orientation.
- Reference to ISO 8502-3
- Identification of the adhesive tape used
- The background used to observe the tape
- Dust quantity rating and particle size class for each surface examined
- Any deviations from the procedure
- Unusual conditions or observed anomalies
- Date and time of testing
Photographs can support documentation, but they should be taken after the visual rating has been completed. Keep reference images clean and free from damage or debris, and use the same tape brand throughout a project where possible. A disciplined approach to sampling, evaluation, and reporting supports clearer decisions before coating application.