If you are using a dial gauge to check runout, parallelism, or flatness, the following notes will help you read correctly, understand properly, and avoid unnecessary errors.
Why are dial gauges often inaccurate despite their simple operation?
The most common mistake lies in users relying too much on the displayed numbers without paying attention to the initial state of the dial. Many cases involve forgetting to reset the needle to zero before measuring, or resetting it incorrectly. This causes all subsequent results to be inaccurate.
Another cause is misreading the number of needle rotations. Dial gauges have a large and a small needle, each rotation representing a specific value. Without monitoring the number of rotations the large needle has made, it's easy to confuse a few percent with a few millimeters, especially when measuring long distances.
Furthermore, the pressure applied to the measuring head directly affects the result. Applying too much pressure causes the workpiece to be misaligned, while applying too little pressure causes the needle to oscillate erratically. This is a mistake that even experienced users sometimes encounter.
See also: What is a dial gauge?
When should you use an analog dial gauge, and when should you use a digital dial gauge?
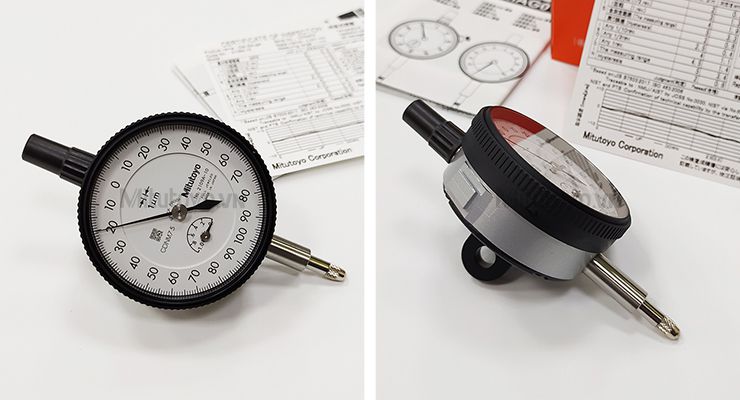
Analog dial gauges remain a popular choice in mechanical workshops due to their high stability, low reliance on batteries, and better resistance to harsh working environments. For repetitive measurements requiring quick observation of movement trends, analog gauges offer a more intuitive and easier-to-control experience.
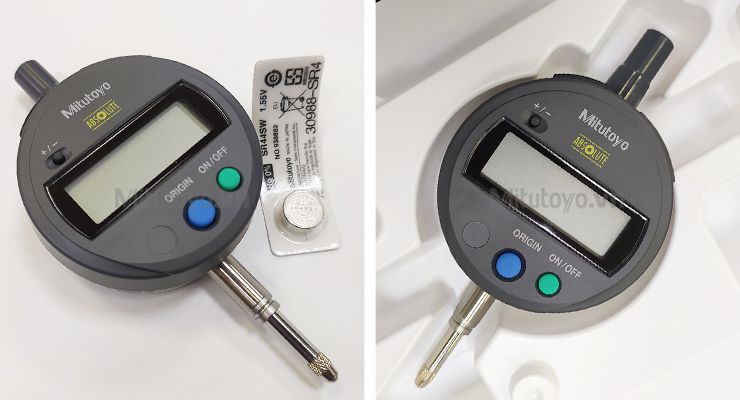
Electronic dial gauges are suitable when quick, clear readings are needed, minimizing needle errors. Measurements requiring multiple recordings and comparisons, or working in dimly lit spaces, are more convenient with electronic gauges.
The placement of the sensor has a greater impact than the type of meter being used
Many errors stem from incorrect probe placement. The probe needs to be in perpendicular contact with the surface being tested. If placed at an angle, the needle will still move, but the obtained value will not accurately reflect the actual deviation.
The contact surface must also be clean, free of oil, dust, or metal shavings. Even a small particle stuck under the probe can significantly alter the result. Before measuring, take a few seconds to check the surface and mounting position; this helps avoid many errors later on.
Choosing the right dial gauge is more important than choosing one with many functions
In practice, when performing measurements, accuracy is not determined by the number of features, but by whether the dial gauge is suitable for the task at hand. Basic measurements such as checking runout, flatness, or parallelism only require a dial gauge with appropriate graduations, a stable needle, and precise operation to be fast and accurate enough.
For example, the Mitutoyo 2416S analog dial gauges that EMIN distributes are widely used in mechanical workshops due to their clear graduations, sensitive needles, and high durability. Experienced mechanics can simply look at the needle to know where the discrepancy is, without having to stop to perform additional operations or adjust auxiliary functions.
Conversely, electronic dial gauges like the Mitutoyo 543 series are better suited for quick readings, data storage, or working with new users. However, if daily work revolves around repetitive measurements, choosing the correct measuring range, graduations, and familiar probe type will still lead to much greater efficiency.
Ultimately, a suitable dial gauge is one that allows you to read numbers faster, with fewer errors, and with less mental strain, not one with the most buttons on its body.

