What is a display eyepiece?
The eyepiece, also known as the viewfinder, is located at the top of the microscope, where you place your eye for observation. It contains lenses of varying magnification, which the user can adjust to achieve the desired image size and clarity. This makes focusing on the specimen easier and more comfortable. Depending on the type of microscope, the eyepiece can be adjusted manually or through a mechanical mechanism.
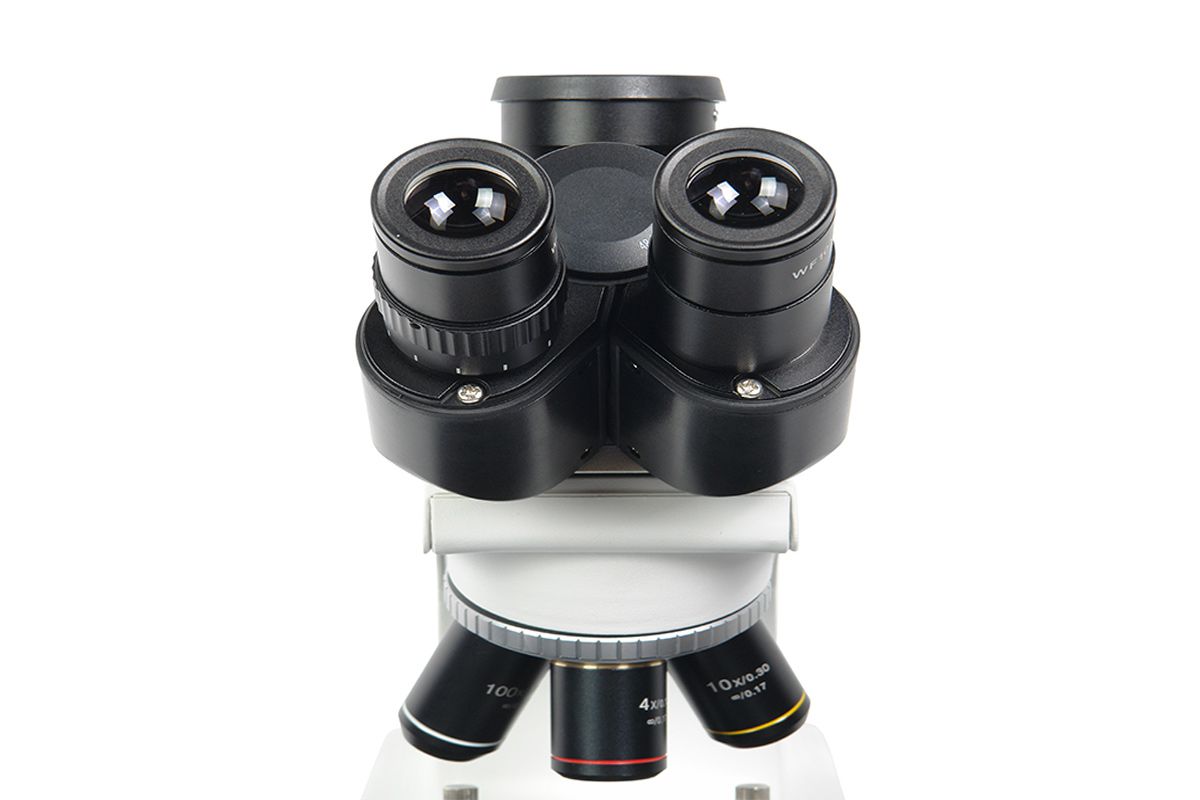
Structure of microscope eyepiece
The eyepiece is assembled from one or more lenses placed in a protective housing, one end attached to the lens body to support the observation process. They are responsible for clarifying the image details of the specimen to the maximum extent.
When used, the observer can rotate or adjust the eyepiece position to achieve the desired sharpness. Moving the eyepiece closer or further from the objective lens will directly affect the quality of the image obtained.
The outside of the eyepiece is usually covered with a durable plastic or metal layer, both protecting the internal lens and ensuring safety during operation. On the eyepiece body there are also symbols to help users easily recognize.
Refer to related articles:
Evaluate fluorescence microscopes, should you invest?
The simplest way to use a microscope
What is the difference between a biological microscope and an electron microscope?
ZEISS microscope - The pinnacle of optical technology
Should I buy an optical or electronic microscope?
How to adjust the eyepiece on a microscope

Depending on the microscope model, the way to adjust the eyepiece will be slightly different, but you should still follow these basic steps to have a comfortable viewing experience and the sharpest image:
- Align the distance between the two lenses
Adjust the distance so that the fields of view of the left and right eyes overlap into a single image. This helps reduce eye strain when observing for a long time.
- Set the diopter knob to position 0
Both eyepieces should be set to 0 to compensate for nearsightedness and farsightedness and return the glasses to the standard state, avoiding discomfort when starting to use.
- Observe properly with both eyes
Start with the lowest magnification objective (4x), use one eye to focus roughly with the coarse focus knob.
Then, close the eye you are using and open the other eye, observe through the second eyepiece. Do not adjust the focus knob, instead adjust the diopter on the eyepiece to achieve sharpness.
When both eyes are clear, gradually increase the magnification (10x, 50x, 100x ...) depending on your observation needs.
- Finish with the highest magnification objective
Repeat the focusing operation to ensure that the image is always clear even when changing the magnification.
Microscopes are now widely used in medicine, education, industry, etc. If you want the device to produce clear and detailed images, you need to master the adjustment operations, which will save time and avoid confusion when using it for the first time.
Hopefully the above instructions will help you confidently master your microscope. If you need further support, do not hesitate to contact EMIN for advice!