To prevent blackening in TIG welds on low-carbon steel, begin with a clean, dry joint and maintain dependable shielding-gas coverage. Blackening, slag deposits, or scorched areas may also be linked to unsuitable current settings or torch positioning.
The practical approach is to check the surface, gas flow, tungsten condition, current, and travel technique together. A smooth-looking weld is not necessarily bright if one of these factors allows oxidation or overheating when using Tig welding machine.
Summary: Clean rust, oil, dust, and moisture from the weld area. Keep shielding gas at an appropriate flow rather than opening the valve excessively. Select current and tungsten for the material thickness, and hold the torch at a consistent angle.
What does blackening in a TIG weld indicate?
Blackening in a TIG weld is a surface condition that may appear as dark discoloration, slag residue, or scorching around the weld. It reduces the visual finish and can require additional surface treatment or polishing after welding.
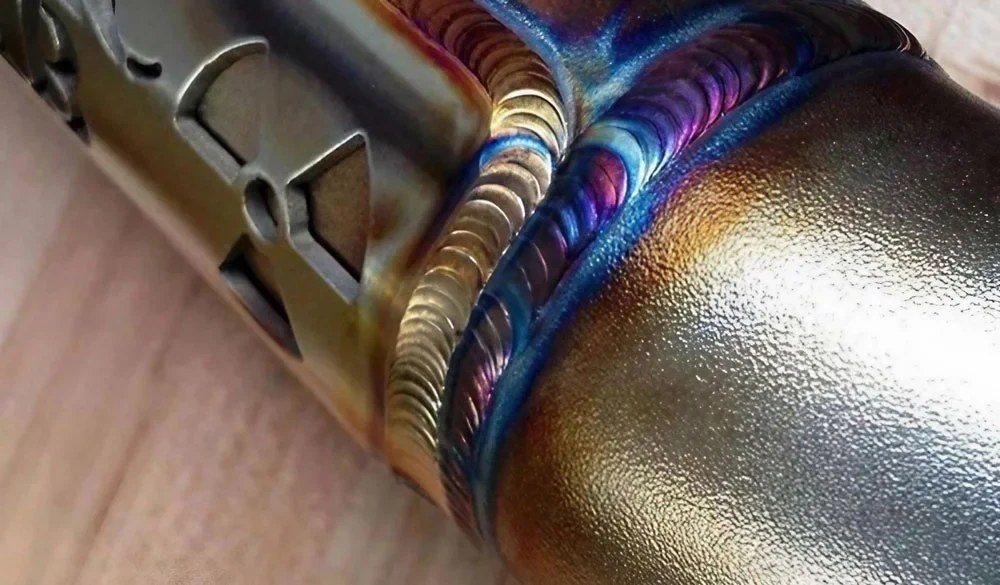
TIG welding uses a non-consumable tungsten electrode and inert shielding gas, such as argon or helium, to protect the weld area. When this protection or the joint preparation is not adequate, the weld can become dull or dark rather than bright.
Why can a dirty steel surface make a TIG weld turn black?
Rust, oil, dust, and other contaminants on the workpiece can contribute to oxidation, discoloration, and porosity in a TIG weld. The weld area should therefore be cleaned before welding and kept dry and free of residue.
- Remove rust from the welding area with suitable grinding equipment.
- Clean oil-contaminated surfaces with an appropriate cleaning solution.
- Check that no dust, moisture, or other impurities remain before striking the arc.
How does shielding-gas flow affect TIG weld color?
Shielding gas must cover the weld area without being set excessively high. The source material notes that opening the gas valve too far can disperse heat too quickly and may contribute to a dark weld appearance.
Argon is identified as the usual shielding gas for low-carbon steel, particularly for thinner workpieces. For thicker material, a mixture of 25% argon and 75% helium is presented as an option to increase arc heat and support penetration.
What TIG current and consumable settings are referenced for low-carbon steel?
Current, gas flow, and tungsten selection should correspond to material thickness; incorrect settings can cause scorching or insufficient fusion. The following values are reference ranges from the supplied material, not universal settings for every joint or machine.
| Parameter | Reference guidance |
|---|---|
| Welding current for material up to 2 mm | 40–90 A |
| Welding current for material from 2 to 3.2 mm | 135–175 A |
| Shielding gas flow | Argon at 8–12 cfh; 10 cfh is cited for steel around 2.4 mm |
| Tungsten electrode | Pointed 2% thoriated or 2% lanthanated tungsten; 1.6–2.4 mm diameter is referenced for thin steel |
Note: Avoid excessive current, as it can scorch the weld. Keep the tungsten clean and prevent it from contacting molten metal.
How should torch angle and welding position be controlled?
A torch angle of about 15° from vertical is cited to help shielding gas cover the weld zone evenly. An unsuitable angle can leave parts of the weld exposed and more prone to oxidation.
For steel, horizontal and overhead positions are described as easier to control than for aluminum because the molten pool is more workable. In vertical-up welding, maintain a steady travel speed from the lower area toward the top to keep the arc stable and reduce the risk of black scorching.
What preparation steps help keep TIG steel welds bright?
For steel welding machine, low-carbon and low-alloy steel between 2.0 and 3.2 mm thick, the source material states that butt joints can be welded in all positions without edge beveling. For fillet and lap joints, thorough cleaning of the weld location is the key preparation step described.
- Clean and dry the joint area completely.
- Set current, shielding gas, and pointed tungsten for the workpiece thickness.
- Tack the workpieces and secure them in a fixture where available.
- Maintain torch angle, gas coverage, and a uniform travel speed throughout the weld.
- Inspect the tungsten and the resulting bead for contamination or scorching before continuing.